![]()
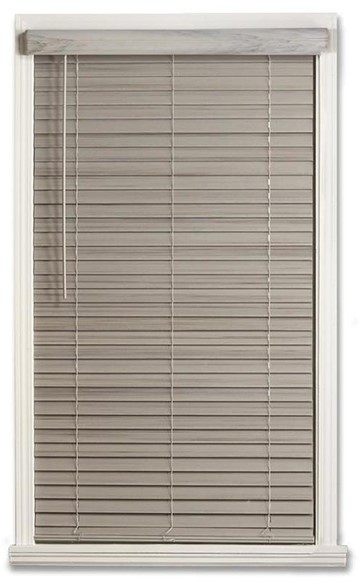
Allen Roth 2 inch Cordless Faux Wood Blind
About Allen Roth
A well-known name in home furnishings, Allen Roth is known for producing elegant and premium furniture, lighting, and accessories. The company was established in 2009 and sells its products only online and in-person at Lowe’s Home Improvement locations.
Modern, contemporary, traditional, and transitional are just a few of the styles and preferences that Allen Roth’s extensive product selection caters to. Their goods are renowned for their high caliber, meticulous attention to detail, and competitive pricing.
PACKAGE CONTENTS
- Blind Store

- Valance
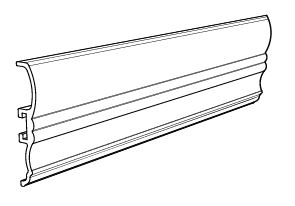
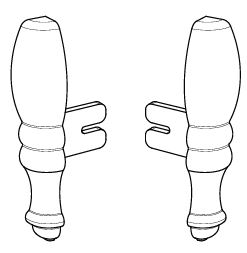
- Wand Baguette
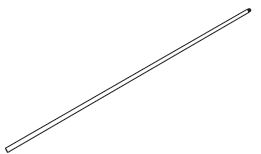
HARDWARE CONTENTS
- Mounting Bracket
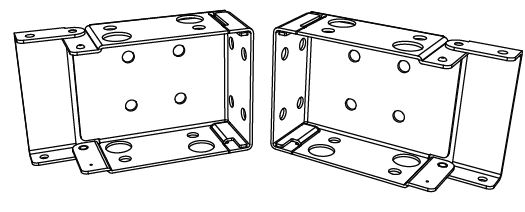
- Hold Down Bracket
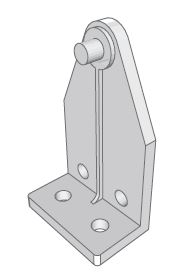
- Medium Screw

- Center Bracket/Support central
29 in. – 36 in./73,66 cm – 91,44 cm = x 1
39 in. – 47 in./99,06 cm – 119,38 cm = x 2
52 in. – 72 in./132,08 cm – 182,88 cm = x 3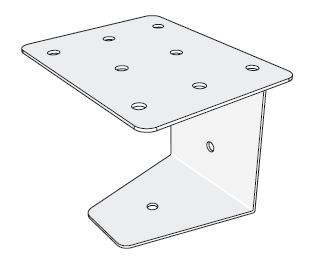
- Large Screw
23 in. – 27 in./58,42 cm – 68,58 cm = x 4
29 in. – 36 in./73,66 cm – 91,44 cm = x 6
39 in. – 47 in./99,06 cm – 119,38 cm = x 8
52 in. – 72 in./132,08 cm – 182,88 cm = x 10
- Valance Clip
23 in. – 36 in./58,42 cm – 91,44 cm = x 2
39 in. – 47 in./99,06 cm – 119,38 cm = x 3
52 in. – 72 in./132,08 cm – 182,88 cm = x 4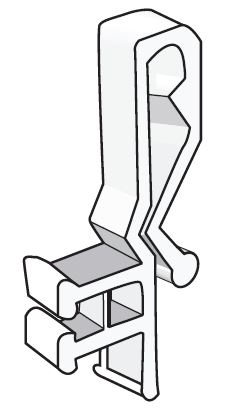
- End Cap
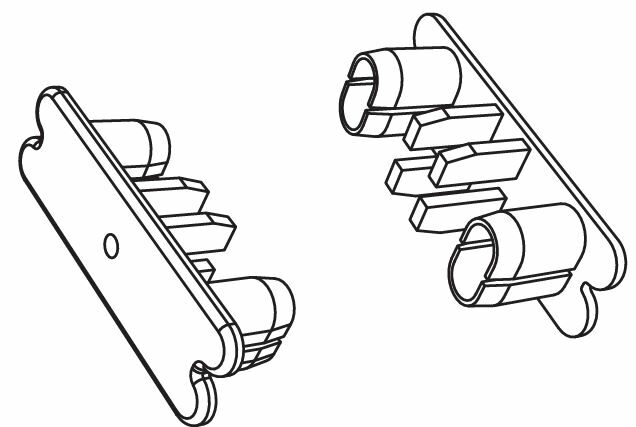
- Valance End Caps
PREPARATION
Before beginning the installation of the product, make sure all parts are present. Compare parts with the package contents list and hardware contents list. If any part is missing or damaged, do not attempt to assemble, install, or operate the product.
- Estimated Assembly Time: 30 minutes.
- Tools Required for Assembly (not included): Pencil, drill, 1/16 in. bit, safety goggles, Phillips screwdriver, tape measure, level.
- Helpful Tools (not included): Step stool.
ASSEMBLY INSTRUCTIONS
- Mark the center of the window opening and the center of the blind (A) with a pencil (not included).
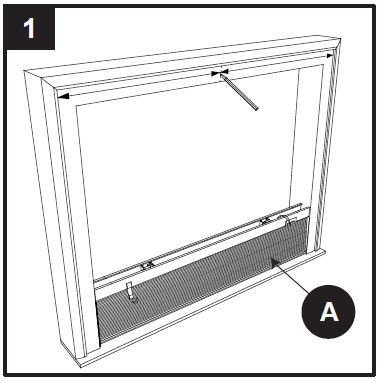
- Hold the top rail of the blind (A) with one hand while pulling the bottom rail of the blind (A) with the other hand until the slats are pulled apart.
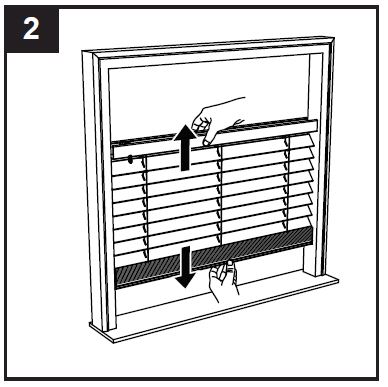
- Slide mounting brackets (AA) on each end of the blind (A) headrail. Position blind (A) in the window, on either the inside or outside and align center marks. Mark the position of mounting brackets (AA) with a pencil.
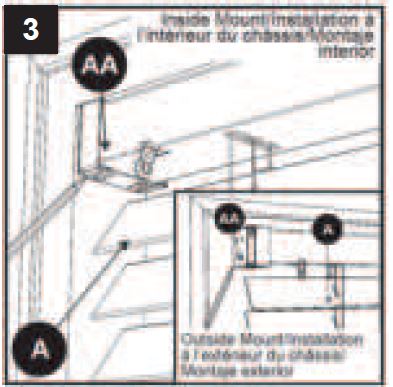
- Remove mounting brackets (AA) from blind (A), align with pencil marks, and attach to the window frame or wall using 2 large screws (EE).
Note: Use 1/16 in. drill bit (not included) to pre-drill pilot holes as needed.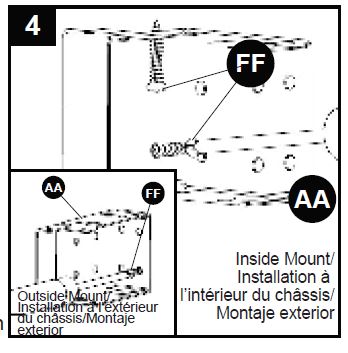
- If the blind width is 29 inches or larger, slide center bracket(s) (DD) onto the headrail from the back of blind (A), positioning it on either side of the middle vertical ladder strings. Temporarily hang blind (A) by sliding the headrail into attached mounting brackets (AA). Mark the location of the center bracket(s) (DD) with a pencil. Remove blind (A).
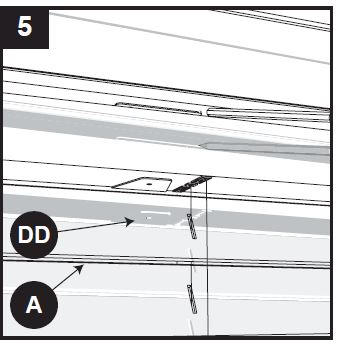
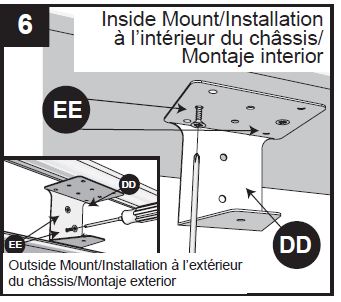
- Align center bracket(s) (DD) with pencil marks and attach using 2 large screws (EE). Note: Use 1/16 in. drill bit (not included) to pre-drill pilot holes as needed.
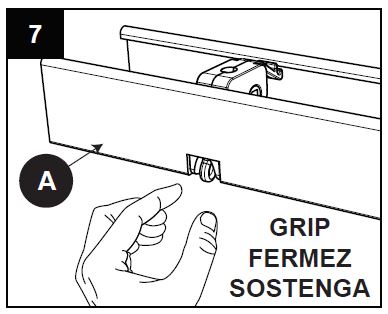
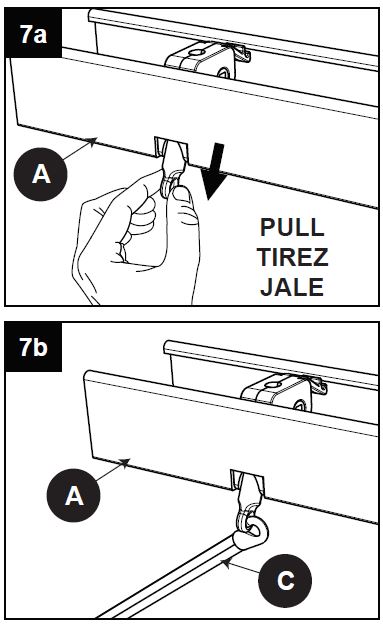
- Install wand (C) by GRIPPING AND PULLING the wand tilter, located on the left-hand side of the blind (A) headrail, and hook wand (C) into the wand tilter.
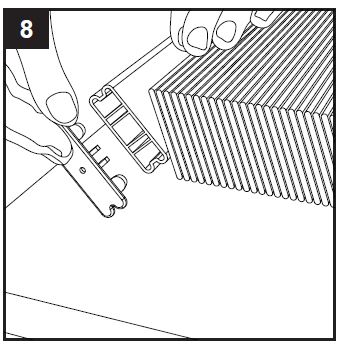
- Insert end caps (GG) into each end of the bottom rail.
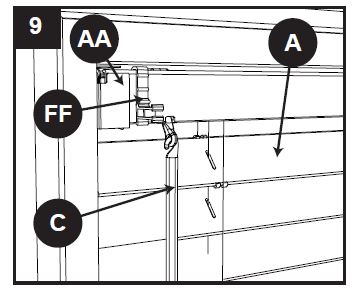
- Attach valance clips (FF) to blind (A) headrail (optional). Hang blind (A) and snap the locking tabs of the mounting brackets (AA).
- OPTIONAL: Slide valance (B) onto valance clips (FF) as needed to center valance (B).
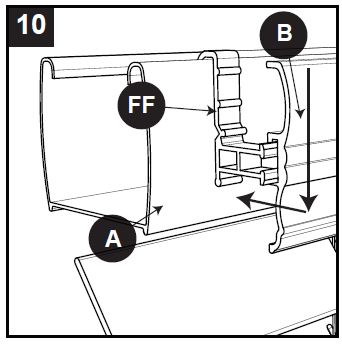
- OPTIONAL: Attach valance end caps (HH) by inserting valance end caps (HH) into ends of valance (B).
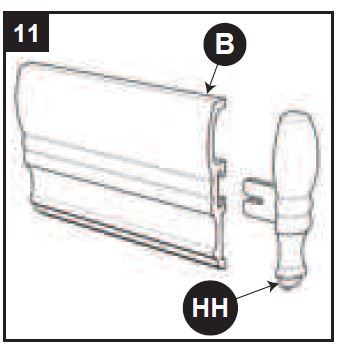
- OPTIONAL: To install hold-down brackets (BB), lower blind (A) to the desired position. Screw hold-down brackets (BB) into the wall or window sill using medium screws (CC) and attach blind (A) to the hole in the cap on the bottom rail.
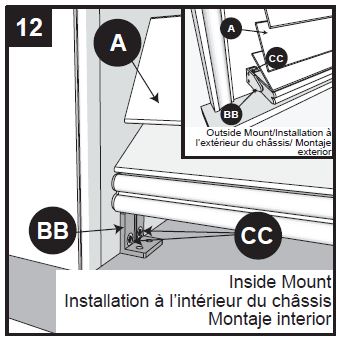
ADJUST THE LENGTH OF BLIND
- Lower blind (A) to maximum length. Cut the desired number of the bottommost slats, leaving the bottom rail as is. Blind (A) can shorten MAX 5 slats (up to 10 inches) with no operation concerns.
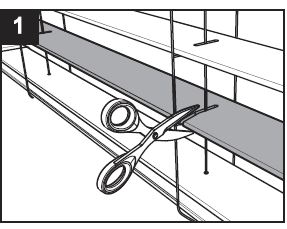
- Remove the cut slats.
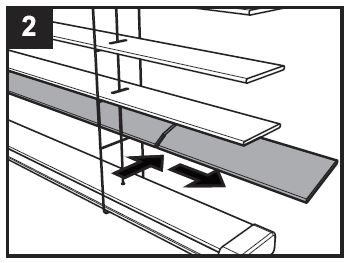
- Cut the excess horizontal ladder strings. CAUTION: Do not cut the vertical ladder strings, as this will void the warranty.
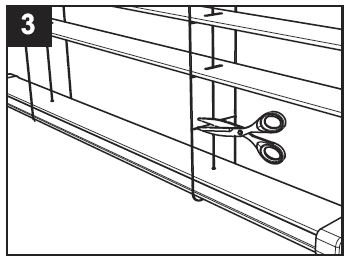
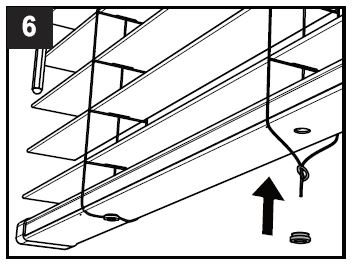
- Remove the plugs from the bottom rail with a flathead screwdriver (not included).
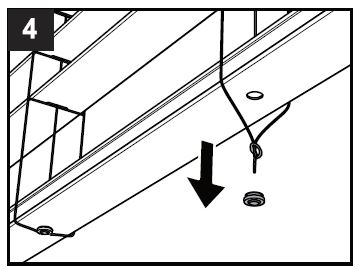
- Slide the bottom rail up to 1 inch below the newest bottom slat.
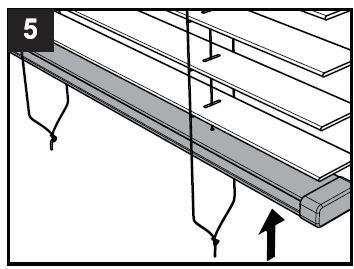
- Twist the cords back into the bottom rail and replace the plugs.
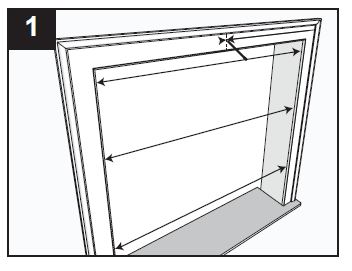
SHORTEN THE WIDTH OF BLIND
This item is manufactured to allow up to 2 inches on each end of the blind (A) to be trimmed for a total of up to 4 inches (Note: 23-in. width blinds allow up to 1 inch on each end of the blind (A) for a total of up to 2 inches).
- Remove blind (A) from the box. Determine the width of the installation site by measuring the width at the top, middle, and bottom of the opening. Using the smallest of 3 measurements, subtract 1/2 inch to allow for mounting brackets (AA); this is the width needed to measure on the blind (A).
 IMPORTANT: Double-check measurements before cutting. Blinds (A) cut in error do not qualify for warranty return.
 - Measure the actual width of the blind (A) and subtract the width determined in Step 1. This is the total trimming amount from blind (A). If the total trimming amount is 1/2 inch or less, only trim one end of the blind (A). If the total trimming amount is greater than 1/2 inch, divide the number by 2 and trim the amount from each end of the blind (A). Pencil a mark on the end(s) of the blind (A) at the determined width(s).
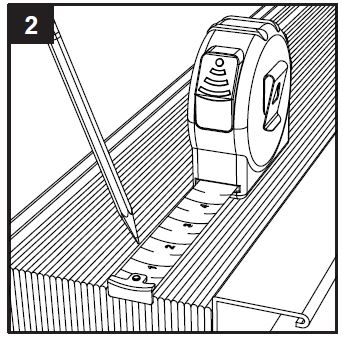 Example: 35 ½ inches -33 inches =2 ½ inches ÷ 2_________=1 ¼ inches Amount to trim from each end The actual width of the blind before cuts Window opening (total from step 1)
 - Align the measuring guide flush with the end of the blind (A). Line up the saw blade with the desired cutting mark
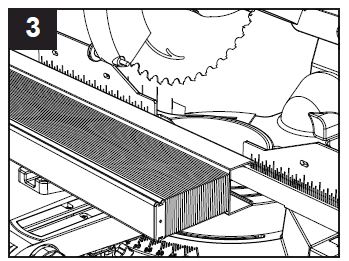
- Using a 10-in. sliding miter saw, 12-in. miter saw or radial arm saw (none included), lay blind (A) on the saw. Slowly cut through the marks you made on blind (A). Repeat the process if cutting both ends.
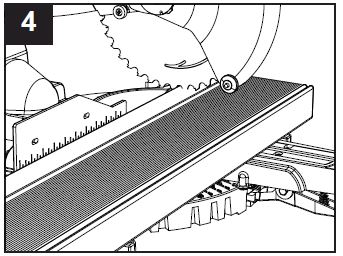 IMPORTANT: Always follow the safety guidelines included with the power tool(s).
OPTIONAL: Cut valance (B) to the desired width — usually 1/2 – 1 inch wider than the blind (A) to hide the mounting brackets (AA).
Proceed to ASSEMBLY INSTRUCTIONS on page 2 to complete the installation.
OPERATING INSTRUCTIONS
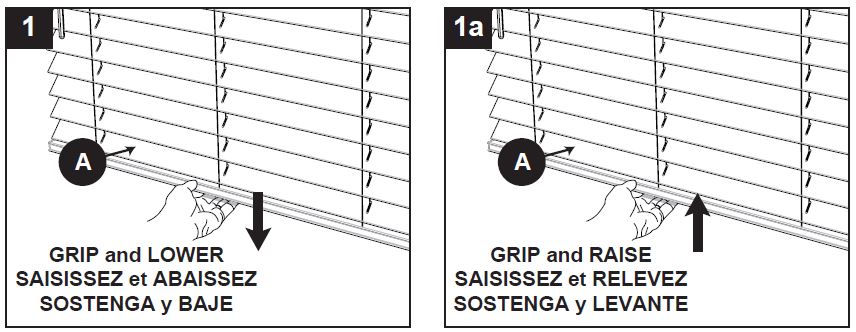
- Raise or lower the blind (A) by gripping the bottom rail and lifting or lowering the bottom rail to the desired height.
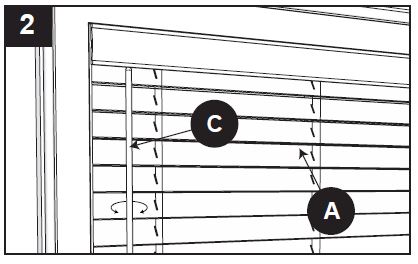
- Open or close the blind (A) slats by turning the wand (C) until the slats are opened or closed to the desired amount.
CARE AND MAINTENANCE
Clean using a damp cloth or vacuum using proper attachments or duster.
WARRANTY
For one (1) year from the date of purchase, the manufacturer will replace this window covering with one of equal value if this window covering is found to be defective in material or workmanship.
This warranty does not cover damage or defects caused by or resulting from improper maintenance, negligent or improper use, abuse, neglect, accidents, the act of God, alteration, commercial use, installation, removal, or reinstallation. This warranty is restricted to everyday consumer use within the United States and Canada.
To obtain warranty service, contact our customer service department at 1-866-439-9800.
REPLACEMENT PARTS
For replacement parts, call customer service at 1-866-439-9800, 8:00 a.m. – 8:00 p.m., EST.
| PART | DESCRIPTION | PART #/N° |
| Hardware Box | 79074-QJ00Z0WTHW2LA |
FAQs Allen Roth 2-inch Cordless Faux Wood Blind
How good are Allen and Roth blinds?
Blinds by Allen & Roth For the price, these blinds are excellent. These are very simple to install and of good quality.
What advantages do cordless blinds offer?
Cordless shades are safe, reliable, and easy to operate. Cordless shades are safer than conventional blinds since they don’t require a hanging cord to open or close, reducing the risk of strangulation. Instead, you just drag the shades up or down with your fingers to make adjustments.
Are imitation wood blinds prone to breaking?
Because they are made of rather thick PVC, which is very tough and undoubtedly much more durable than any blind made out of wood, faux wood blinds are possibly the most difficult form of blind to break.
Do imitation wood blinds deteriorate in sunlight?
Although they are less expensive, faux wood blinds mimic real wood blinds in appearance. Polymer vinyl composite is a common material for these blinds. Faux wood blinds that are less expensive could be made of softer foam. However, continual sun exposure could cause them to deteriorate.
How are Allen and Roth’s blinds cleaned?
A little mixture of dishwashing liquid (not dishwasher goods) and fresh, clean, warm water will take care of filth and grease for added grime-fighting. A suitable ratio is 5% dishwashing liquid to 95% water.
What keeps cordless blinds in place?
The bottom rail is held in place by a plastic lip that runs through its center. And it’s over, bang. That’s it, for real! Some cordless blinds include a spring tension feature that operates more like a projection screen.
Are cordless blinds more durable?
Blinds with cords usually last longer. Depending on how they are treated, corded blinds may last a little while longer than cordless blinds.
How do cordless blinds lower themselves?
You only need to pull down on the bottom rail of the blinds to know how to lower cordless blinds. On the other hand, place your hand under the bottom rail and slowly move it up to raise the cordless blinds.
For More Manuals by Allen Roth, Visit the Latest Manual
- Allen Roth Granite Kitchen Sink User Guide
- Allen Roth 2027VA-30-201 White Undermount Single Sink Bathroom Vanity Installation Guide
- Allen Roth L1120H-WH Valdosta Ceiling Fan Instruction Manual
- Allen Roth CLL14CH Flush Mount Ceiling Fixture Instruction Manual
 |
Allen Roth 2 inch Cordless Faux Wood Blind User Guide [pdf] |

